Benefits
This lesson shows how to tweak the “What you get” section in Framer: edit feature text and numbers in the layers panel, and update scrolling images via the Image Scroll component’s primary variant, powered by sticky scroll and layered opacity effects.

Learnoverse Instructor / Senior Product Designer
Allie Walters
Beginner
3:31
Lesson Transcript
Hello and welcome to this “landing page” tutorial, part of a 5-module series on how-to-use the Learnoverse template.
This tutorial dives into how to edit the Benefits “What you get” images on the landing page.
Each lesson has been carefully crafted so you can dip in and out as and when you need the relevant support.
In this “landing page” tutorial, you’ll learn how to customise the What you get section for your own Learnoverse.
Let’s get into how.
Head over to the left panel in Framer and ensure you are on the “Home” page.
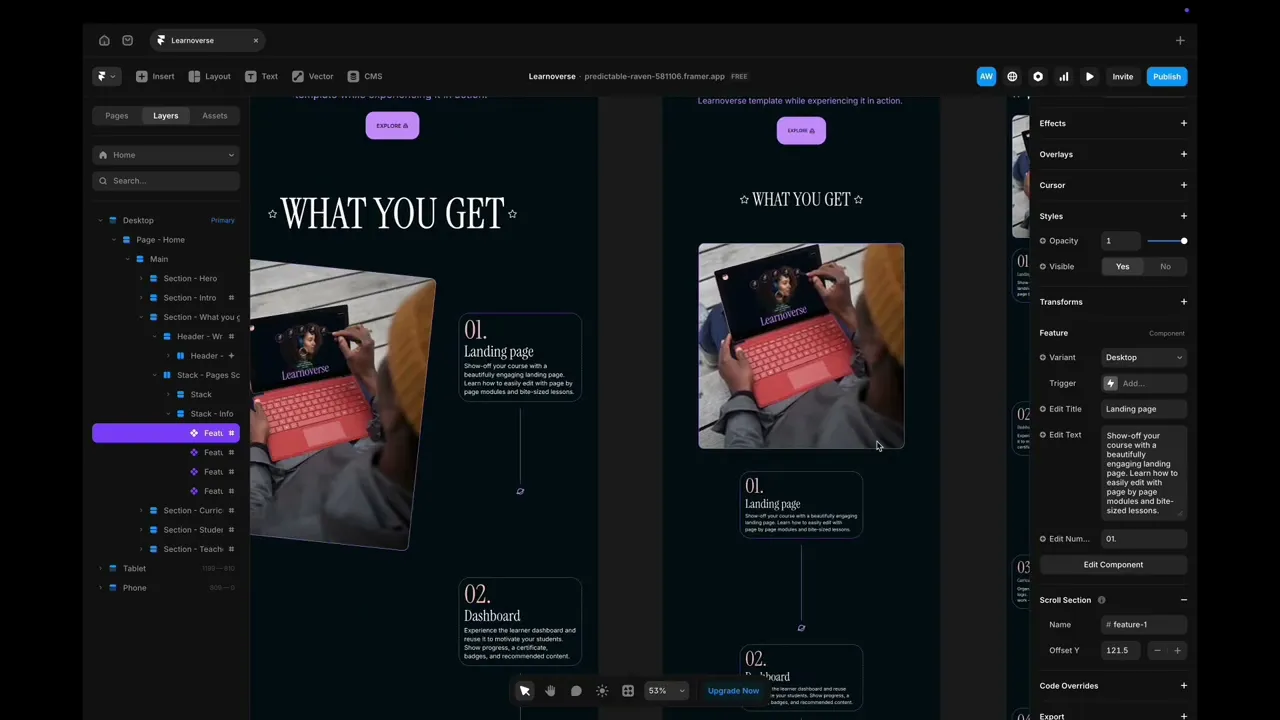
Click the “layers” panel at the top to expand all layers and see how this section has been structured.
Locate the Features 1 to 4 components, which are displayed using a purple diamond shape in the left panel.
Click on the feature number you would like to edit, and head over to the panel on the right. You’ll see that you can then easily edit the title, text, and number.
It’s important to note that each time you edit a feature, it will update the text on tablet and desktop as well.
If, for any reason, you require slightly different text on the different browser sizes, you can make changes directly on the tablet or mobile sizes, which won’t affect the desktop version.
The pictures on the left are set up using variants inside a component.
To edit these, go back to the left panel on the homepage, and then locate the component “Image scroll”.
Double-click the image-scroll component, which will take you to this component page to edit.
It’s important to note that this section behaves differently for desktop, tablet, and mobile due to the various screen sizes.
For desktop, you can change the images by going to the “Desktop Primary version”.
Any image updates need to be made just to this version, since the primary version controls all other versions.
Simply click on each image and change these to your own customised images using the image function in Framer.
A bit of a hot tip here, each of the 4 image variants has all 4 images as a stack, but if you look closely in the right-hand panel, you’ll see that the opacity is set to zero on the images that aren’t showing.
Head back to your homepage and watch how your new images beautifully scroll down.
For this to work properly, the “Image scroll” component needs to be set to “sticky” on the homepage itself, and the viewport set to 100 vh.
Features 1 to 4 must also be set to 100 vh and scroll using scroll sections on the right-hand side panel.
That’s it for now.
For more information on how to edit text styles, colours, padding, shapes, and scroll sections, head over to the official Framer Academy resources. I’ve popped the link on this Learnoverse lesson page.
Start customising your landing page “what you get” section now, and I’ll see you in the next tutorial.