Teachers
This lesson covers tweaking the Teachers section in Framer: edit text and cards, swap animated icons, and update components like pricing, accordion, and testimonials for site-wide style changes.

Learnoverse Instructor / Senior Product Designer
Allie Walters
Beginner
4:31
Lesson Transcript
Hello and welcome to this “landing page” tutorial, part of a 5-module series on how to use the Learnoverse template. This tutorial dives into how to edit the “Teachers” section on the landing page.
Each of the lessons has been carefully crafted so that you can dip in and out as and when you need the relevant support.
In this “landing page” tutorial, you’ll learn how to customise the Teachers section for your own Learnoverse.
Let’s get into how.
Head over to the left panel in Framer and ensure you are on the “Home” page.
Click the “layers” panel at the top to expand all layers and see how this section has been structured.
To edit the title, simply click on the layer or directly on the page, head over to the right panel, and edit in the field next to content.
You can easily edit the animated “Story text” component, indicated by a purple diamond, by single-clicking on the page, heading to the right panel, and changing the text here.
To edit the animated text component itself, indicated by a purple diamond shape, double-click the component. Once you’re on the “Story text” component page, you can easily change styles, such as colours and text, by clicking on the elements and heading over to the right panel.
The icon animations are licensed and free for you to use.
To change the icon, simply download the icon you want in JSON file format.
Then, with the current animation clicked, head over to the right panel, click the small cross next to the existing icon, and upload your new icon.
You can change the colours of your animation directly in Lordicon. You can change the titles and subtext in the right panel on Framer under “Text”.
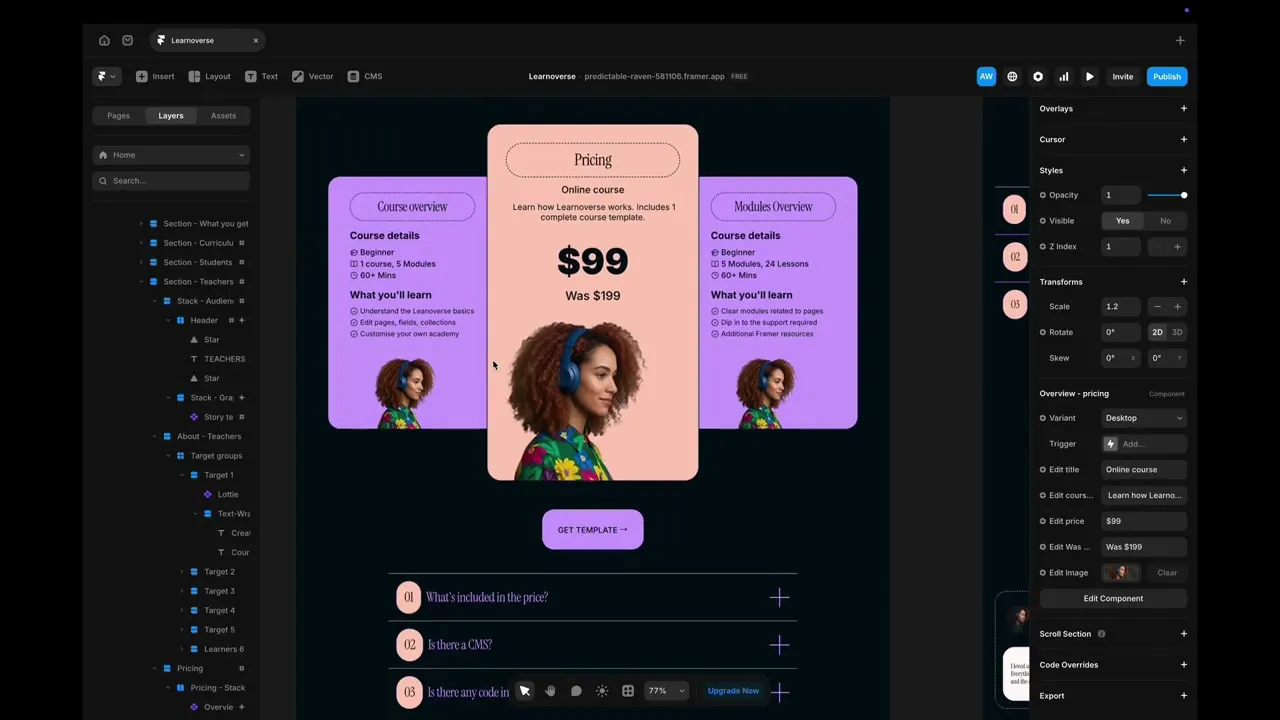
To edit the “Overview- pricing” and “Overview-course” component cards indicated by a purple diamond, simply single-click on the card component you’d like to edit via the layers panel or by clicking directly on the page. Head over to the right panel, and under the component name, you can change the text and any associated image.
To change the inherent design of either of these two components, double-click the component and make any changes to the Desktop-primary version.
You can change the button in the same way, see the Module One, buttons tutorial.
The Accordian component can be changed in a similar way.
Click on the “Accordian” component indicated by a purple diamond shape, and head over to the right panel to make changes to text.
To edit the accordion component design, double-click the component and make changes to any styles there.
It’s important to note that there is another “Question” component associated with the main accordion component. Make changes to this on the “Question” component.
For the testimonials section, make edits to the “Story text” component, as mentioned above.
To make changes to a testimonial, simply click on the testimonial you’d like to edit and head over to the right properties panel to edit.
You can also edit the component design styles by double-clicking on any of the card instances and heading over to the testimonial card component page.
Any changes you make to the design styling on this testimonial component will then apply to all other instances.
That’s it for now.
For more information on how to edit text styles, colours, padding, shapes, and scroll sections, head over to the official Framer Academy resources. I’ve popped the link on this Learnoverse lesson page.
Start customising your Teacher section now, and I’ll see you in the next tutorial.