Side nav
This lesson covers customising the side navigation in Framer: edit text, icons, and colours directly in the Nav component across its device variants, and update lesson titles or details via the CMS, where changes automatically sync across the dashboard, curriculum, and lesson pages.

Allie Walters
Learnoverse Instructor / Senior Product Designer
Beginner
3:48
Lesson Transcript
Hello and welcome to the sixth tutorial in this 5 module series on how to use the Learnoverse template.
Each of the lessons has been carefully crafted so that you can dip in and out as and when you need the relevant support.
In this “side navigation” tutorial, you’ll learn how to customise the side navigation that is on your dashboard, curriculum, and each of your lesson pages.
Let’s get into how.
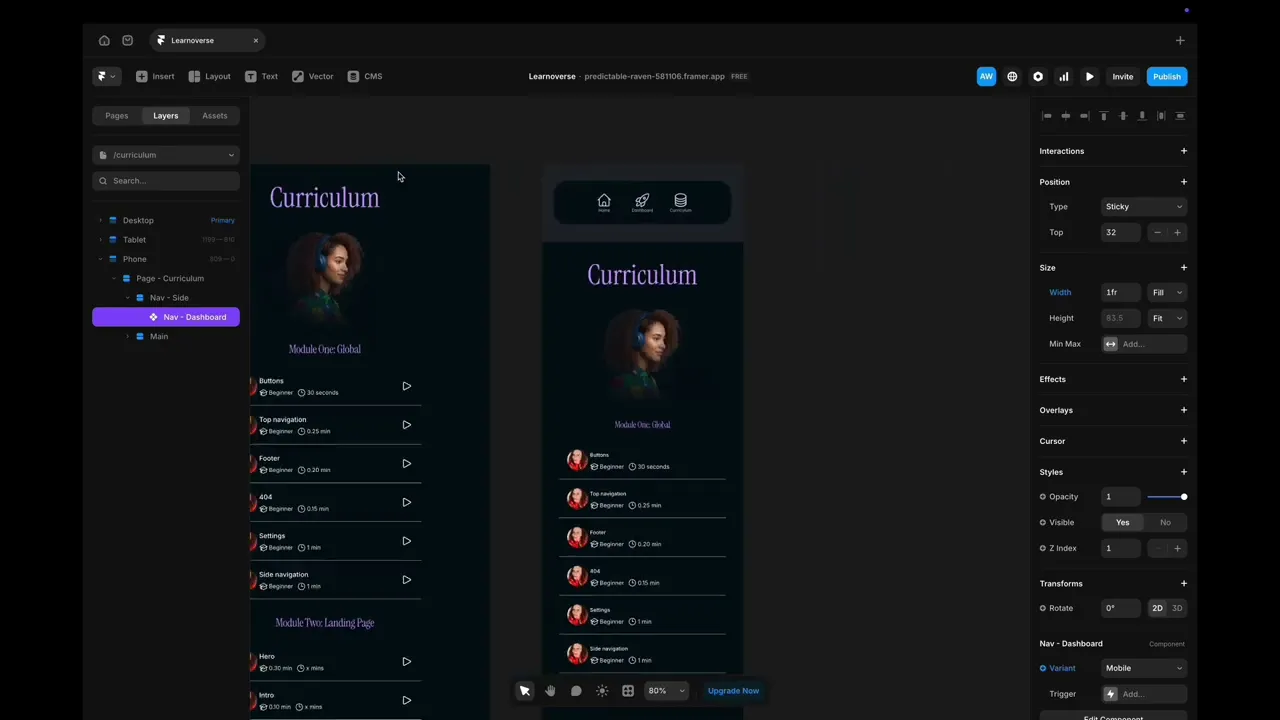
Learnoverse has side navigation variants for the “curriculum” and “dashboard” pages, and an expanded variant for the lesson pages on desktop.
In addition to this, there’s a slightly different closed variant for mobile that shows on the dashboard and curriculum pages.
The quickest way to access the “Nav-dashboard” component is to double-click the component on the page itself.
Once you land on the “Nav-Dashboard” component, you’ll see two versions of the side navigation. The first version is the side navigation that’s on the dashboard and curriculum page. There are 3 variants of this version, 1 for desktop, 1 for tablet, and 1 for mobile.
The second version is the side navigation that’s on each of the lesson pages on desktop only. You’ll see there are 7 variants of this version to show open and closed states.
To change any of the text, colours or icons, simply click on the primary “closed desktop” version, click on the icon or text, and edit in the right-hand panel.
Updating the icons is easy, as there is already a library of “hero” icons attached to choose from.
Simply head over to the properties panel, click the icon and search through th eicon library to choose.
To change the hover colours, double-click on the relevant stack containing the icon and button label, and change the colours on this component page by heading to the right-hand panel.
Use the breadcrumbs at the top to easily navigate back to the “nav-dashboard” component.
It’s important to note that the modules ‘open” components are integrated with the Framer CMS. To edit any of these field names, you’ll need to head over to your CMS Collection.
You can head over to your CMS collection by clicking on the small “CMS” collection icon at the top Framer panel. It’s a small icon showing stacked circles.
Here you will find all of the Learnoverse modules and their associated lesson pages.
We’ll delve deeper into the CMS in a later tutorial, but for now, just know that you can edit any titles that pull through into the side nav here.
Simply click the module you would like to edit and you’ll see all of the lessons.
Choose the lesson you would like to edit, and then move across until you see “Time required”, “Level”, and “Lesson title”.
You can directly edit the time, level, and lesson title here. These are all the fields that correspond with the curriculum page, and the desktop open module side navigation.
You can also access the lesson pages by switching on the “toggle overlay” button and editing any of the fields from there.
Edits to fields connected to these pages will automatically update.
We’ll delve further into the Framer cms in the following modules.
That’s it for now!
For more information on the Framer CMS, head over to the official Framer Academy resources. I’ve popped the link on this Learnoverse lesson page.
Start customising your side navigation now, and I’ll see you in the next tutorial.